Automating a C++ program from a Node.js web app
This post is the second in a series of four posts dedicated to showing you how to get your C++ application onto the web by integrating with Node.js. In the first post, I outlined three general options:
- Automation - call your C++ as a standalone app in a child process.
- Shared library - pack your C++ routines in a shared library (dll) and call those routines from Node.js directly.
- Node.js Addon - compile your C++ code as a native Node.js module/addon.
Each of these options have their advantages and disadvantages, they primarily differ in the degree in which you need to modify your C++, the performance hit you are willing to take when calling C++, and your familiarity / comfort in dealing with Node.js and the V8 API. This post is all about automation. If you haven’t read the first post, you might want to check that out first, before going forward.
Why use Automation?
If your C++ runs standalone from a command line - or can be made to do so - you can run it using Node’s child process API. This option works for bringing just about anything to the web - it really doesn’t make a difference what language your command line program is written in if you are simply running it. If you are reading this hoping to get C code, Fortran code, or some other language onto the web - then this option is worth reading.
Two features of automation make it attractive. First, since you are executing the C++ application in another process, you are essentially doing the C++ job asynchronously - which is a big win on the web since you can process other incoming HTTP traffic while the C++ app is working. Second, you really don’t need to do a great deal of language integration or use sophisticated V8 API’s - it’s actually pretty easy!
All of the code for this series is available on github:
> git clone https://github.com/freezer333/cppwebify-tutorial.git
For this particular post, checkout the automation tag
> git checkout automation
Case Study: Prime Sieve C/C++ implementation
As described in the opening post, I’m building all my examples for this series around a C implementation of the Sieve of Eratosthenes Prime number calculation strategy. It’s a good example problem, because speed matters big time for prime numbers - and the C code that I’m using is not exactly the type of thing you’d be eager to rewrite!
The example I’m using - found here - is actually pretty simple, compared to more complex techniques that leverage CPU caching, among other things. Head over to primesieve.org to get an idea. For implementations of Prime Sieve, the user of the program must enter a maximum value, and the algorithm will output all prime numbers “under” this value. We’ll call that input value “under” throughout most of this post.
To follow along, please take a look at the original primesieve.c code now - although don’t get too caught up in the details, we won’t need to mess with it much (that’s the whole point!).
Modifications to primesieve.c
When faced with integrating a legacy program, you might not have the luxury of accessing the code. For the purposes of this article, I’m going to simulate a few common integration scenarios - and I’ll edit some bits of the original primesieve.c in order to allow for this.
- Scenario 1: An app that gets input only from command line arguments, and prints to standard out.
- Scenario 2: An app that gets input from the user (stdin), and prints to standard out.
- Scenario 3: An app that gets input from a file, and outputs to another file.
To simulate each scenario, we’ll want to be able to pass a file descriptor into the main routine of primesieve.c, so the program doesn’t always print to the console. Let’s rename main to generate_args and add a third parameter for the file descriptor. We’ll make specific use of this in Scenario 3.
// in cppwebify-tutorial/cpp/prime4standalone/prime_sieve.c, I've renamed
// int main(int argc, char *argv[])
// to:
int generate_args(int argc, char * argv[], FILE * out) {
    ... complicated prime number stuff ...
I’ll write the entry point in a different file (main.cpp), so I’m also adding the declaration of generate_args to a header file called prime_sieve.h.
I’m creating a second function - generate which provides a simplified interface - it just accepts the “under” parameter instead of command line arguments. The definition is at the bottom of prime_sieve.c, and just transforms the parameter into character arguments and calls generate_args. This is just so I don’t edit the original code much, and to make Scenario 2 below a little cleaner. Obviously, the imaginative reader can figure out better ways of doing all this :)
// at the bottom of cppwebify-tutorial/cpp/prime4standalone/prime_sieve.c,
// an adapter function for use when we aren't using command-line arguments
int generate(int under, FILE *out) {
  char * name = "primes";
  char param [50];
  sprintf(param, "%d", under);
  char * values[] = { name, param};
  generate_args(2, values, out);
}
So, we’re left with the following prime_sieve.h header - using extern C to make sure our C functions can be integrated correctly with the C++ main files I’ll use in the examples.
extern "C" {
    // the old main, renamed - with a third parameter"
    // to direct output to a file as needed
    int generate_args(int argc, char * argv[], FILE * out);

    // an adapter function when the caller hasn't
    // received under through command line arguments
    int generate(int under, FILE * out);
}
The Node.js Child Process API
Node.js contains a child_process module which exposes a robust API for creating and controlling processes. There are three basic calls for creating new child processes - each with their own use cases.
The first is execFile, which accepts (at a minimum) a file path to an executable program. You may pass an array of arguments that will be called with the program. The last parameter to the function is a callback to be executed when the program terminates. This callback will have an error, a stdout buffer, and a stderr buffer given to it, which can be used to interrogate the program’s output. It’s important to note that this callback is only called after the program executes. execFile also returns an object representing the child process, and you may write to it’s stdin stream.
// standard node module
var execFile = require('child_process').execFile

// this launches the executable and returns immediately
var child = execFile("path to executable", ["arg1", "arg2"],
  function (error, stdout, stderr) {
    // This callback is invoked once the child terminates
    // You'd want to check err/stderr as well!
    console.log("Here is the complete output of the program: ");
    console.log(stdout)
});

// if the program needs input on stdin, you can write to it immediately
child.stdin.setEncoding('utf-8');
child.stdin.write("Hello my child!\n");
I find the execFile function is best when you have to automate an application that has well-defined input and operates in sort of a “single phase” - meaning once you give it some input it goes off for a while, and the dumps all of it’s output. This is precisely the type of program the prime sieve program is - so we’ll use execFile throughout this post.
The child_process module has two other functions to create processes - spawn and exec. spawn is a lot like execFile, it accepts an executable and launches it. The difference is that spawn will give you a streamable interface to stdout and stderr. This works really well for more complex I/O scenarios where there is a back and forth dialog between your node code and the C++ app. exec is again very similar to execFile, but is used for shell programs (ls, pipes, etc).
Synchronous options
In Node.js v0.12 a new set of API’s was introduced which allows you to execute child applications synchronously - your program will block when you start the child process and resume when the child process terminates (and sends you back it’s output). This is fantastic if you are creating shell scripts, but it’s decidedly not for web applications. For our prime number demo, certainly when we get an HTTP request for prime numbers we need to wait for the complete output before serving the page of results to the browser - but we should be able to continue serving other HTTP requests from other browsers in the meantime! Unless you have a really specific reason, you’ll want to stay away from spawnSync, execSync, and execFileSync when writing web servers.
Scenario 1: C++ Program with input from command-line arguments
The simplest type of program to automate is a program that will accept all of it’s input as command line arguments and dump it’s output to stdout - so we’ll start with this scenario.
So - let’s “imagine” prime sieve works like this (actually, it basically already does!). To use the application, we might type:
> primesieve 10
2
3
5
7
# {1 <= primes <= 10} = 4
0.000000000000  -3.464368964356
And we’d get all prime numbers under 10 printed out to the screen (one on each line) - plus some extra info printed by the program that we don’t need.
I’ll keep the output easy to parse in all my examples - obviously if your program spits out data in a tough-to-parse way, you’ll have a bit more work to do.
Using node-gyp to compile the prime sieve C++
Our first step is to actually get an executable C++ application! The C++ code in cpp/prime4standalone doesn’t have an entry point - it’s just the prime number generation code, and it will be shared across all 3 of the scenarios we’re covering in this post. In cpp/standalone_stdio I’ve created an entry point:
#include <iostream>
#include <stdio.h>
#include "prime_sieve.h"
using namespace std;

int main(int argc, char ** argvs) {
    generate_args(argc, argvs, stdout);
}
The next step is to build the C++ executable - compiling together all three files:
cpp/standalone_stdio/main.cppcpp/prime4standalone/prime_sieve.hcpp/prime4standalone/prime_sieve.c
If you are familiar with building C++, you’ll have no trouble doing this with whatever your favorite compiler platform is. For this tutorial we’re going to eventually need to use node-gyp, which is node’s wrapper around Google’s gyp build system - so I’ve setup all the C++ examples this way.
We’ll need to first install node-gyp:
> npm install -g node-gyp
To build this C++ app, type the following command from the terminal at cpp/standalone_stdio.
> node-gyp configure build
You’ll need to make sure you have a C++ compiler installed on your system - node-gyp will use whatever you have depending on your system (Windows will require the VS command line compiler tools).
How does this work? In /cpp/standalone_stdio you’ll find a binding.gyp file. This contains all the information needed to build this particular example with node-gyp - think of it as a Makefile.
{
  "targets": [
    {
      "target_name": "standalone",
      "type": "executable",
      "sources": [ "../prime4standalone/prime_sieve.c", "main.cpp"],
      "cflags": ["-Wall", "-std=c++11"],
      "include_dirs" : ["../prime4standalone"],
      "conditions": [
        [ "OS=='mac'", {
            "xcode_settings": {
                "OTHER_CPLUSPLUSFLAGS" : ["-std=c++11","-stdlib=libc++"],
                "OTHER_LDFLAGS": ["-stdlib=libc++"],
                "MACOSX_DEPLOYMENT_TARGET": "10.7" }
            }
        ]
      ]
    }
  ]
}
Lets cover a few basics. We only have one target defined (“standalone”) - so it has become the default. It’s type is critical here, because node-gyp can also compile shared libraries and native Node.js addons (which is why it’s so useful for this blog series!). Setting type to executable tells node-gyp to create a standard runnable executable. The sources array contains our source (the header is not needed, but could be added). Since a lot of my C++ later in this tutorial will make use of C++11, I’m also passing in a few compiler flags in the cflags property. I also pass along OS X specific stuff to make C++11 work on a Mac with XCode. These special options are included in the conditions property and are ignored under Linux and Windows. Finally, I’ve made sure the compiler can find the include file by adding in the path under the include_dirs property.
The result of our build operation - node-gyp configure build - should create an executable in cpp/standalone_stdio/build/Release called standalone. You should be able to run it directly from the command line. Now let’s run it from Node.js.
Automating from Node.js
In the first post I setup a really simple Node.js web application that had a single route that could calculate prime numbers using a pure JavaScript prime sieve implementation. Now we’ll create a second route that uses our C++ implementation.
In cppwebify-tutorial/web/index.js first we’ll add a new entry in our types array for the new C++ route:
var types = [
  {
    title: "pure_node",
    description: "Execute a really primitive implementation " +
                               "of prime sieve in Node.js"
  },
  {
    title: "standalone_args",
    description: "Execute C++ executable as a child process, using command " +
                 "line args and stdout.  Based on /cpp/standalone_stdio"
  }];
That type array is used to create the routes by looking for a file named the same as each title property in the web/routes/ directory:
types.forEach(function (type) {
    app.use('/'+type.title, require('./routes/' + type.title));
});
Now let’s add our route in /web/routes/standalone_args. If you take a look, lines 1-9 are basically the same as the pure_node example - line 11 is where we start respond to an actual user request for prime numbers by executing the C++ app:
router.post('/', function(req, res) {
    var execFile = require('child_process').execFile
    // we build this with node-gyp above...
    var program = "../cpp/standalone_stdio/build/Release/standalone";

    // from the browser
    var under = parseInt(req.body.under);
    var child = execFile(program, [under],
      function (error, stdout, stderr) {
        // The output of the prime_sieve function has
        // one prime number per line.
        // The last 3 lines are additional information, which we
        // aren't using here - so I'm slicing the stdout array and
        // mapping each line to an int.
        // You'll certainly want to be a bit more careful
        // parsing your program's output!
        var primes = stdout.split("\n").slice(0, -3)
                           .map(function (line) {
                             return parseInt(line);
                           });

        res.setHeader('Content-Type', 'application/json');
        res.end(JSON.stringify({
          results: primes
        }));

        console.log("Primes generated from " + type);
    });
});
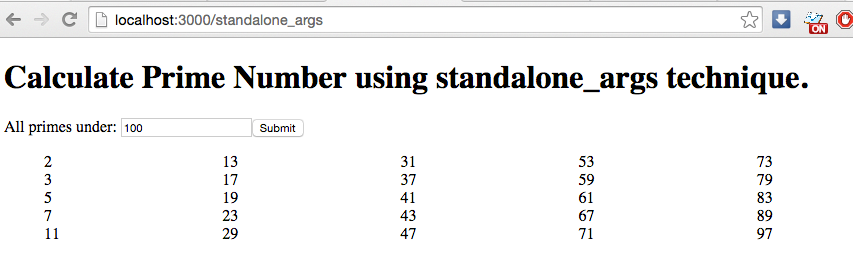
While you’ll likely need to be a bit more robust when handling program output (and dealing with input from the browser), as you can see it’s pretty simple to call your child process and return a response to the browser. Go ahead and run the web app by typing node index.js in your terminal under cppwebify-tutorial/web and point your browser to http://localhost:3000/. Choose the “standalone_args” strategy, you can enter 100 to get all the primes under 100 - this time using a much faster C-based implementation!
Scenario 2: C++ Program that gets input from user (stdin)
Lots of programs ask an actual user for their input. If you have access to the code of your program, it’s probably easy to change it so it accepts these inputs as command line args - which means you could just use the strategy in Scenario 1. Sometimes this won’t work though - like if you don’t even have the source code! It also doesn’t work when automating a program that actually has a bit of a dialog with the user, which you need to simulate through node. No worries though - writing to stdin is pretty straightforward, especially if you don’t need to wait for any output from the child process first (if you do, check out spawn instead of execFile by the way).
Building the C++ example
In cpp/standalone_usr I’ve created a new entry point for a C++ program that simply asks the user for the under parameter the prime sieve algorithm needs.
#include <iostream>
#include <stdio.h>
#include "prime_sieve.h"
using namespace std;

int main(int argc, char ** argvs) {
    int max;
    cout << "Please enter the maximum number:  ";
    cin  >> max;
    generate_primes(max, stdout);
}
It’s including the very same prime_sieve.h file as the code in Scenario 1, and is build with a strikingly similar binding.gyp file. Go ahead and build that with node-gyp configure build at the terminal from cpp/standalone_usr.
Writing to stdin to automate from Node.js
Now we’ve got a new executable build, which asks for input from a live user. We can now drop yet another route into our web app to automate this one too. In web/index.js we’ll create another type entry:
var types = [
  {
    title: "pure_node",
    description: "Execute a really primitive implementation of " +
				"prime sieve in Node.js"
  },
  {
    title: "standalone_args",
    description: "Execute C++ executable as a child process, " +
		"using command line args and stdout.  " +
		"Based on /cpp/standalone_stdio"
  },
  {
    title: "standalone_usr",
    description: "Execute C++ executable as a child process, " +
		" using direct user input.  Based on /cpp/standalone_usr"
  }];
And we’ll create a new route at web/routes/standalone_usr.js. In this file, our code will no longer pass under as a command line argument however, instead we’ll write to stdin:
router.post('/', function(req, res) {
    var execFile = require('child_process').execFile
    // notice we're pointing this to the new executable
    var program = "../cpp/standalone_usr/build/Release/standalone_usr";

    var under = parseInt(req.body.under);
    // execFile will return immediately.
    var child = execFile(program, [],
      function (error, stdout, stderr) {
        // This function is still executed once the program terminates...
        var primes = stdout.split("\n").slice(0, -3)
                       .map(function (line) {
                           return parseInt(line);
                       });

        res.setHeader('Content-Type', 'application/json');
        res.end(JSON.stringify({
          results: primes
        }));

        console.log("Primes generated from " + type);
    });

    // now we write "under" to stdin so the C++ program
    // can proceed (it's blocking for user input)
    child.stdin.setEncoding('utf-8');
    child.stdin.write(under + "\n");
    // Once the stdin is written, the C++ completes and
    // the callback above is invoked.
});
By now you probably have the idea.. fire up the web app again and now you’ll have a third entry at the start page - go ahead and test it out!
Scenario 3: Automating a file-based C++ program
The last scenario I’ll go over is where the program you are automating takes its input from a file, and dumps its output to a another file. Of course, your scenario might be a combination of the three scenarios discussed here - and your scenario might involved a fixed filename for input/output, or a user specified (via stdin, or command line arguments). Whatever your situation, you’ll likely be able to apply what’s here.
Modifications to prime sieve to use files
So the first step is to shape the prime sieve into something resembling a file-based program. If you take a look at cpp/standalone_flex_file, I’ve created a third entry point for prime sieve that accepts input/output filenames along the command line. The input file is assumed to simply have “under” on the first line. The output file will receive the same lines of results as previously went to stdin.
#include <iostream>
#include <stdio.h>
#include "prime_sieve.h"

using namespace std;

// Simulating a legacy app that reads
// it's input from a user-specified file via command line
// arguments, and outputs to a similarly specified file.
int main(int argc, char ** argvs) {
    FILE * in = fopen(argvs[1], "r");
    int i;
    fscanf (in, "%d", &i);
    fclose(in);

    FILE * out = fopen(argvs[2], "w");
    generate_primes(i, out);
    fprintf(stdout, "Output saved in %s\n", argvs[2]);
    fclose(out);
}
We can build this C++ program by issuing the familiar node-gyp configure build from cpp/standalone_flex_file. This will generate a target executable we can use from node.
Dealing with file-based program on the web
Before diving into the Node.js route for this scenario, lets talk about the challenge involved in a file-based program. Most applications never meant for the web will read a specified input file and write to an output file as if the application is the only thing running… and as if it’s not running alongside another instance of the same program! This made sense when these applications were being run manually - but if you are placing them on the web you can easily have multiple simultaneous requests (from different browsers) coming in at the same time. It’s critical that these simultaneous executions of your legacy C++ program don’t collide with each other - you need to ensure they are reading from and writing to their own distinct files!
When you don’t have access to the legacy source code, this can be easier said than done, especially if the app does not let the user specify the files (i.e. they are hardcoded in the program!). If they are hardcoded, but relative file paths, then I usually create a copy of the executable (or a link to it) in a temporary directory on each incoming web requests. It’s costly performance-wise, but it works. If the files paths are hard coded to absolute paths, you have quite a problem (find the code!).
I’ve simulated the easiest (but most common) situation, where the input and output files can be specified by the user (in this case, via command line arguments). All we need to do is make sure each web request that launches the C++ app picks unique filenames - and I usually do this by creating temporary directories on each web request, placing the input/output files within the temporary directory. This shields each running instance from the others, while keeping the input/output names consistent.
So now lets jump the Node.js route. At the top of web/routes/standalone_file.js I’ve required the temp module, which I use to handle the creation of temporary directories and files. It drops the temporaries in the appropriate location for your platform.
var temp = require('temp');
Below is the route code found in web/routes/standalone_file.js.
router.post('/', function(req, res) {
    var execFile = require('child_process').execFile
    var program = "../cpp/standalone_flex_file/build/Release/standalone_flex_file";
    var under = parseInt(req.body.under);

    // Create a temporary directory, with node_example as the prefix
    temp.mkdir('node_example', function(err, dirPath) {
      // build full paths for the input/output files
      var inputPath = path.join(dirPath, 'input.txt');
      var outputPath = path.join(dirPath, 'output.txt');

      // write the "under" value to the input files
      fs.writeFile(inputPath, under, function(err) {
        if (err) throw err;

        // once the input file is ready, execute with the input and
        // output paths specified on the command line
        var primes = execFile(program, [inputPath, outputPath],
         function(error) {
           if (error ) throw error;
           fs.readFile(outputPath, function(err, data) {
             if (err) throw err;
             var primes = data.toString().split('\n')
                              .slice(0, -3)
                              .map(function (line) {
                                return parseInt(line)});
             res.setHeader('Content-Type', 'application/json');
             res.end(JSON.stringify({results: primes}));
             exec('rm -r ' + dirPath, function(error) {
               if (error) throw error;
               console.log("Removed " + dirPath);
           });
         });
      });
    });
  });
});
The above code first creates the temporary directory. It then writes the input file and launches the child process with the input and output file paths as command line arguments. Once the process completes, we read the output file to get the results, serving it back to the browser just like before. Finally, we clean up the temporary files by removing parent directory. This is important, since even though the temp module allows for tracking and automatic deletion of temporary files, it only cleans things up when the process terminates. Since this is a web app, we would (hopefully!) be waiting a long time for this to happen.
As you can see, this code would benefit from better control flow patterns(async, promises, etc). I’m trying to stick to the bare minimum, I’ll leave that to you :).
Aside from the route above, I’ve added this final scenario to the types array in web/index.js and you can start your web app and test this one out just like the others.
Up next…
This post presented the first option introduced in the series - automation. It works really well when you really have your hands tied - like if you can’t edit the source code of the legacy C++ app. It also allows for asynchronous execution of the C++ code, and limits the work you need to do. There is, however, a large cost to launching processes. Not only is it a relatively slow operation, it is also resource intensive. If you expect a lot of traffic, you’ll quickly realize that launching a new process for each incoming request doesn’t scale well at all.
I wrote up three types of integration scenarios that I think cover the most common cases, but I’m sure there are some legacy (or new) programs that require different strategies - if you’ve seen some, drop a note into the comment section!
In the next post, I’ll take a look at the second option - compiling your C++ code into a shared library/DLL and calling it from Node.js. This option offers better scalability because the C++ code is executed in process - however it does block your event loop. It also allows your Node.js code to make many calls into the DLL, giving you more fine-grained interaction. In this next post, I’ll specifically cover compiling shared libraries in node-gyp as well as using the ffi module for Node.js to interact with it.