Calling Native C++ DLLs from a Node.js Web App
This post is the third in a series of four posts dedicated to showing you how to get your C++ application onto the web by integrating with in Node.js. In the first post, I outlined three general options:
- Automation - call your C++ as a standalone app in a child process.
- Shared library - pack your C++ routines in a shared library (dll) and call those routines from Node.js directly.
- Node.js Addon - compile your C++ code as a native Node.js module/addon.
Each of these options have their advantages and disadvantages, they primarily differ in the degree in which you need to modify your C++, the performance hit you are willing to take when calling C++, and your familiarity / comfort in dealing with Node.js and the V8 API.
If you haven’t read the first post, you might want to check that out first, before going forward. The second post covered automation in detail, and also introduced the C++ code that I’m focused on calling - a prime number implementation found here.
This post focuses entirely on compiling your C++ as a shared library or DLL, and calling that code from Node.js using FFI. I’ll also discuss some of the common issues you can run into when converting a legacy C++ application into a callable shared library. This post focuses on C++, but any language that can be compiled into a native shared library can be called from Node.js using these techniques. For example, if you are looking to compile Rust code into a library that can be integrated with Node.js, check this out!
Why use a Shared Library / DLL?
When automating a C++ application, you have the advantage of having really clean separation between your JavaScript and C++. Automation also allows you to integrate with just about every programming language - as long as it can be automated through stdin/stdout or input and output files. One disadvantage though is that there is really only one entry point to your C++ - main. You could certainly develop complex coordination between your C++ and Node applications, but automation works best when you just want to send some input to C++ and wait for the results.
Often you want fine-grain control and coordination between Node.js and C++. You’d like to be able to call into C++ through functions, not just an executable’s entry point. Further, you’d like to be able to get output from those functions as return values (or reference parameters), not by harvesting output from stdout or some output file.
A shared library (or DLL) is an excellent solution in this situation. If your C++ is already in a DLL, then you can get started right away - but if not, you can generally compile your legacy code into a DLL fairly easily - you just need to figure out which methods/functions you wish to expose to callers. Once you have a DLL, utilizing the interface through Node.js is pretty easy (read on!).
Converting a legacy C or C++ application into a DLL can be a good integration choice when automation is too cumbersome. It also lets you avoid the intricacies of developing native C/C++ modules for Node using the V8 API, which isn’t always trivial.
Getting the tutorial code
All of the code for this series is available on github:
> git clone https://github.com/freezer333/cppwebify-tutorial.git
For this particular post, checkout the dll tag
> git checkout dll
Once you’ve checked out the code, take a moment to survey the directory structure I’ve setup. The /cpp directory is where I’ve put all the C++ applications developed for the automation post, with the shared source for prime number generation in /cpp/prime4standalone. In this post, we’ll need to modify the prime number code to allow it to work well as a DLL, and I’ll put that code in /cpp/prime4lib. As was the case in the other posts, the sample web application is in /web. We’ll just be adding one route (ffi) in this post - for the shared library implementation.
Preparing the C++ as a Shared Library
If you are trying to integrate an existing shared library into Node.js, then you can basically skip this section - you are all set! If you have some legacy C++ code that was originally a standalone app (or part of one), you need to prepare your code to work as a shared library first. The major considerations when doing this is defining your API - the set of functions that should be callable by the host code (in our case, Node.js). Perhaps your C++ already is organized such that these functions are ready to go - but you may need to do a bit of reorganization.
Another main consideration is how you’ll get your C++ code’s output. For example, in the automation post, I ran a bunch of standalone primesieve applications from Node - each one either outputted prime numbers directly to standard out or to an output file. We don’t want this for shared libraries though - we want the output returned to the caller. To do this, you might need to get a bit creative - I’ll show you how I’ve done it in the section below.
Here’s the API I want my shared library to support. Actually, it’s not much of an API - it’s just one function!
int getPrimes(int under, int primes[]);
The first parameter represents the maximum value - such that we’ll find all prime numbers under this value. The prime numbers will be stuffed into the second parameter - an array. It is assumed that this array has enough space to store all the generated prime numbers (under is a good “maximum” size.). The function will return how many prime numbers were actually found.
Capturing the output
Now let’s look at the code from the automation post. Inside /cpp/prime4standalone, the primesieve.c file had one main function:
int generate_args(int argc, char * argv[], FILE * out)
It also has an adapter, generate, which replaces the argc/argv parameters with under. In both cases, notice that the output is being sent to out using fprintf. For our API, we want the output to be placed inside an array.
One approach might be to just start hacking away at the underlying primesieve implementation, replacing the fprintf calls with some code to load up an array. This can work (especially if this is new C++ code, or at least C++ that is fairly straigtforward), but it’s not particularly scalable (what if you have a more complex set of actions you need to perform to capture the output?). I find making modifications to legacy programs goes best when you keep your changes simple - and that’s what I’ll do here.
Data Exchange utility class useable from C or C++
As with most things in life, keeping one thing simple often makes something else more complicated. My goal is to replace each fprintf statement in the existing primeseive code with a similarly simple function:
void send(int prime);
I want that send function to be able to add the prime number into an array, which is sent in from the calling Node.js code:
// called from Node.js - calls to send should add prime to primes
int getPrimes(int under, int primes[]);
This seems simple enough, we could achieve something like this by making send a member method of an object that could have a reference to the array. This gets complicated by the fact that primeseive is straight C code though.
Let’s start with the data exchange class, found in exchange.h:
#define _exchangeclass
#include <iostream>
#include <functional>
using namespace std;

class exchange {
public:
    exchange(const std::function<void (void * )> & c) {
        this->callback = c;
    }
    void send(int data){
       this->callback(&data);
    }
private:
    std::function<void (void * )> callback;
};

#include "c_exchange.h"
The first thing you’ll note is that the class itself does not contain a reference to an array. To keep it general, I am simply having it hold a callback function - which will be responsible for storing the given value to the array in this example, but could do anything at all.
Notice the last line - I’m including a separate header file called c_exchange.h. The send member of exchange is not callable from C code (primesieve), and as you might have guessed, c_exchange.h contains a function to get around this problem. Lets take a look inside:
#ifdef _exchangeclass
extern "C" {
#endif

void pass(void * exchanger, int data);

#ifdef _exchangeclass
}
#endif
First off, this header is going to be included by C++ and C code. exchange.h, which declares the exchange class defines the _exchangeclass symbol - so the first line is just detecting if that symbol is already there. If it is, the pass function - which will be called from C - is wrapped in an extern block.
The pass function accepts a pointer to an exchange object (void *, since the exchange class won’t be visible to C callers). Within the definition, found in exchange.cpp, we see that this pointer is cast back to an exchange object and the send method is called:
void pass(void * exchanger, int data) {
    exchange * xchg = (exchange * ) exchanger;
    xchg->send(data);
}
It’s a bit elaborate, but the exchange class and it’s standalone pass helper function can be dropped into nearly any existing C++ or C legacy program, simply by getting a pointer to an exchange object into the legacy code and replacing output calls with pass. Let’s do this with primesieve.c.
Modifying primesieve to use passing function
Inside /cpp/prime4lib I have a modified primesieve.h and primesieve.c. The old primesieve.h defined the following two functions:
// primeseive.h for standalone programs
int generate_args(int argc, char * argv[], FILE * out);
int generate_args(int under, FILE * out);
Now I’ve replaced these with the following signatures:
// primesieve.h for library calls
int generate_args(int argc, char * argv[], void * out);
int generate_args(int under, void * out);
Inside primeseive.c the old standalone code had a #define setup to use fprintf, on line 43. Note, I am not the author of the original primsieve code - I do not know the history or intent behind the elaborate printing scheme. As with most legacy apps, sometimes those questions are better left un-asked!. We now replace the fprintf(out, UL"\n",x) call with a call to pass(out, x).
The shared library entry point
Now we have a primesieve.h/primeseive.c implementation that uses pass, we just need to create a C++ entry point that creates an exchange object and calls the primesieve code. I have done this in /cpp/lib4ffi/primeapi.h and /cpp/lib4ffi/primeapi.cpp.
primeapi.h is the shared library entry point, it has the declaration for the library API function I wished for up above:
extern C {
    int getPrimes(int under, int primes[]);
}
The implementation uses the exchange class, with a lambda function as the callback. As you can see, the lambda function adds whatever data is sent to the array.
int getPrimes(int under, int primes[]) {
  int count = 0;
  exchange x(
        [&](void * data) {
            int * iptr = (int * ) data;
            primes[count++] = * iptr;
        }
  );

  generate_primes(under, (void*)&x);
  return count;
}
Now, when we call generate_primes, which is defined in primesieve.h, we pass in a reference to our exchange. Within primesieve.c that reference to the exchange object is called out. All calls to pass(out, x) in primesieve.c result in the pointer out being cast as an exchange object (in exchange.cpp), and the callback (the lambda) is fired. The end result is that all values computed by primesieve are found in the primes array.
Building the Shared Library with gyp
We need to build our shared library now. Luckily, the very same toolset we used in the previous posts - node-gyp - can help us here as well. Inside /cpp/lib4ffi you’ll find another config file named binding.gyp. It’s quite similar to the gyp files found in the standalone examples from the previous post, but it links in the primesieve files from /cpp/prime4lib instead of /cpp/prime4standalone and it’s build type is shared_library instead of executable.
Build the shared library by issuing the familiar node-gyp configure build from cpp/lib4ffi. This will generate a target shared library we can use from node. The shared library will be in /cpp/lib4ffi/build/Release - with an extension specific to your operating system (ie. prime.dylib on OS X, prime.dll on Windows).
Calling primelib with FFI
All that work and we have a shared library - now let’s call it from Node.js. To do this, we’ll use Node’s Foriegn Function Interface (node-ffi). node-ffi is a Node.js addon for loading and calling dynamic libraries using pure JavaScript. There is an excellent tutorial here that outlines some more detail. In particular, checkout the async section, which shows you how to easily call shared library methods in their own threads using libuv so you don’t block your main Node.js event loop!
One of the key parts of using node-ffi is mastering the ref module to build native data types on top of the Node.js Buffer object. These datatypes (int, arrays, etc.) allow you to interact with native functions found inside a shared library.
Our API has but one call, and it uses two integers and an integer array for return types and parameters:
int getPrimes(int under, int primes[]);
Simple integers don’t require us to do much (node-ffi automatically converts to and from the JavaScript number type), but we do need to allocate an integer array to hold our results. Here’s how we do it with ref
var ArrayType = require('ref-array');
var IntArray = ArrayType(int);
var a = new IntArray(10); // creates an integer array of size 10
Next, we use the ref data type identifiers and node-ffi to define the interface to our library:
var ffi = require('ffi')
var ref = require('ref')
var int = ref.types.int

var libprime = ffi.Library('../cpp/lib4ffi/build/Release/prime', {
  'getPrimes': [ int, [ int, IntArray] ]
})
The libprime variable now represents our getPrimes function found in the shared library we created in the previous section. We can call the function, and it’s return type can be saved in a normal JavaScript number variable. We can use the returned count to extract the prime numbers out of the IntArray - giving us all the prime numbers under 10.
var count = libprime.getPrimes(under, a);
var primes = a.toArray().slice(0, count);
Putting it all together
Now that we have a shared library, and the Node.js code that can call it, let’s wrap it all up into it’s own route inside our growing web app example. Inside the /web/index.js file we are going to add another entry for a route called ffi.
var types = [
  {
    title: "pure_node",
    description: "Execute a really primitive implementation of prime sieve in Node.js"
  },
  //... the entries for the automation example routes...
  {
    title: "ffi",
    description: "Using Node Foreign Function Interface (ffi) to call C++ code.  Based on /cpp/lib4ffi"
  }
  ];
That type array is used to create the routes by looking for a file named after each title property in the web/routes/ directory:
types.forEach(function (type) {
    app.use('/'+type.title, require('./routes/' + type.title));
});
Now let’s add our route in /web/routes/ffi.js. The relevant post handler is below, and it looks a lot like the ffi example above:
router.post('/', function(req, res) {
    var ffi = require('ffi')
    var ref = require('ref')
    var ArrayType = require('ref-array')
    var int = ref.types.int
    var IntArray = ArrayType(int)

    // The under parameter is coming from the user input (form)
    var under = parseInt(req.body.under);
    var a = new IntArray(under);

    // Create the interface to our shared library
    var libprime = ffi.Library('../cpp/lib4ffi/build/Release/prime', {
      'getPrimes': [ int, [ int, IntArray] ]
    })

    // call the prime number code and extract the array of primes.
    var count = libprime.getPrimes(under, a);
    var primes = a.toArray().slice(0, count);

    // send the primes right back to the browser for display
    res.setHeader('Content-Type', 'application/json');
    res.end(JSON.stringify({
      results: primes
    }));
});
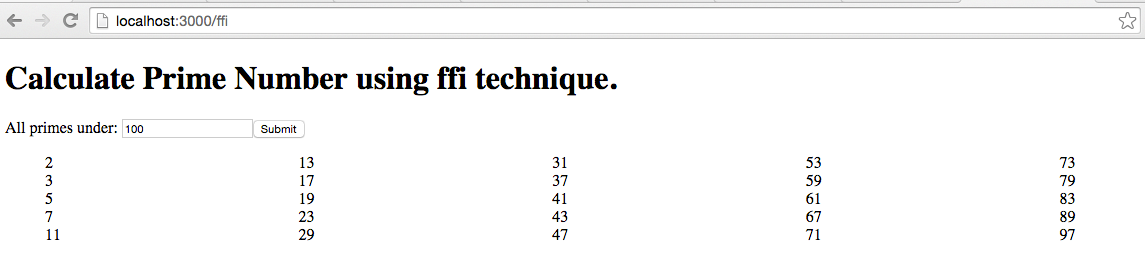
Now fire up your web app by typing node index.js from /web and choose the ffi option. Type in 100 and click “submit” and you should see the prime numbers under 100 on your screen, this time generated by the DLL/shared library.
Up next…
This post presented the second option introduced in the series - using a DLL/shared library and node-ffi. This option is perfect if you already have a DLL - but I also spent some time in this post showing you how to take existing standalone programs and re-organizing them so they can be built into shared libraries. We used node-gyp to build the shared libraries in a cross-platform manner, and I showed you how to call the library using node-ffi - effectively integrating the C++ code and Node.js without getting into the details of V8. This option will work for C and C++ libraries, but also works with any language that can be compiled to a native library (i.e. Rust). The big advantage over automation is that you can have much more fine-grained coordination between Node.js and C++ - because you can pick and choose when to call any one of the functions your C++ library exposes.
In the next post, we get to the most complex, but also the most powerful Node.js / C++ integration strategy - writing native Node.js modules. I’ve covered native modules extensively in previous posts, and I’m also working on an ebook covering the subject. In the next post, I’ll show you how to leverage the Nan library to build native modules that are not tied to specific version of the V8 engine - an important topic I’ve yet to cover on this blog.